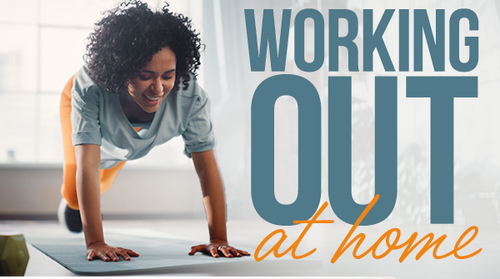


Do you suffer from shoulder pain?
A lot of people do. According to theNational Institutes of Health, up to a quarter of the American adult population experiences shoulder pain at any given time.
Fortunately, there are simple stretches and exercises you can do to help protect your shoulders. First, let’s see why shoulder problems are so common.
Shoulder Anatomy
You might think of your shoulder as a single joint, but it actually consists of two joints.
Theacromioclavicular joint is where the shoulder blade, orscapula, meets the collarbone, orclavicle. It lies above theglenohumeral joint, where the bone of the upper arm, called thehumerus, sits in a socket called theglenoid.
These joints are held together by a system of muscles andtendons, which attach muscles to bones. Among them are four tendons that form therotator cuff, which connects the humerus to the shoulder blade.
The entire assembly is contained within a sac called thecapsule that lubricates the joint. In addition, another sac, called abursa,provides cushioning between the top of the shoulder and the rotator cuff.
Common Shoulder Problems
Given the shoulder’s complexity, it’s not surprising that injuries are fairly common.
Apart from fractures of bones within the joint—which can be caused by falling or as the result of sports injuries or car accidents—the most common shoulder problems include:
- Arthritis: Pain that can develop after injuries or from chronic wear and tear(osteoarthritis).
- Bursitis: A painful swelling of the bursa that cushions the rotator cuff; it can occur after overuse of the joint or in association with tendon problems.
- Frozen shoulder:Extreme stiffness that makes movement very difficult; it can occur after an injury creates scar tissue, the joint has been immobile or, in some cases, for no discernible reason at all; people between 40 and 60 are most commonly affected.
- Instability: This can occur afterdislocations, when trauma completely forces the head of the humerus out of the socket, orsubluxations, when the humerus partially comes out; soft-tissue damage may then leave the shoulder prone to pain and unsteadiness when moving the arm up or away from the body.
- Separation or sprain: A tearing of the ligaments that hold the clavicle to the scapula, causing a lump at the top of the shoulder; often occurs when you put out your hand to break a fall.
- Tendon issues: Tendonitis, or an inflammation of the tendon, can occur after excessive use or as the result of arthritis or age-related wear; tendons can also tear, and while tears, especially of the rotator cuff, are best known for occurring in athletes they can also happen in older people whose tendons have weakened or who have existing shoulder problems.
In most cases you can try treating mild shoulder pain at home with rest and over-the-counter painkillers, followed by gentle stretching and exercise. Call your healthcare provider if the pain doesn’t subside within a month.
On the other hand, make an appointment as soon as possible if the pain arises from an injury or if the shoulder is swollen, you have a fever or the skin is red or blue. And crushing shoulder pain that comes on suddenly—especially if it also runs from your chest to the left arm, jaw or neck—may signal a heart attack; call 911 immediately.
“After an injury or surgery, an exercise conditioning program will help you return to daily activities and enjoy a more active, healthy lifestyle,” says the American Academy of Orthopaedic Surgeons (AAOP; you can find a practitionerhere). “Talk to your doctor or physical therapist about which exercises will best help you meet your rehabilitation goals.” (Gohere to find a physical therapist.)
Shoulder Stretches
It’s always a good idea to stretch before exercise in order to reduce injury risk and improve your range of motion. And stretching afterwards “can help reduce muscle soreness and keep your muscles long and flexible,” according to the AAOP.
Perform the following stretches five or six times a week, or as directed by your practitioner.
Pendulum
Do two sets of 10 for each arm, taking care to not round your back or lock your knees.
1. Place one hand on a firm surface for support and lean forward. Let your other arm hang freely at your side.
2. Gently swing the hanging arm forward and back. Then repeat the exercise moving side to side and again in a circular motion.
3. Repeat the entire sequence with the other arm.
Crossover Arm Stretch
Keep your elbow neutral while performing this stretch; do not put pressure directly on the elbow.
1. Stand up straight and relax your shoulders. Then gently pull one arm across your chest as far as possible while holding onto the upper arm.
2. Hold for 30 seconds and then relax for 30 seconds.
3. Repeat with the other arm.
Passive Internal Rotation
This exercise requires a light stick, such as a yardstick. Repeat four times on each side; keep your hips facing forward and don’t twist your body.
1. Hold a stick behind your back with one hand; use your other hand to lightly cusp the other end of the stick.
2. Use the hand that’s holding the middle of the stick to pull horizontally until you feel a pull (without pain) in the other shoulder.
3. Hold for 30 seconds and then relax for 30 seconds. Repeat on the other side.
Passive External Rotation
This exercise requires a light stick, such as a yardstick. Repeat four times on each side; keep your hips facing forward and don’t twist your body.
1. Grasp the stick with one hand in front of you and cup the other end with the other hand.
2. Keep the elbow of the shoulder you are stretching against the side of your body and push the stick horizontally in that direction to the point of feeling a pull without pain.
3. Hold for 30 seconds and then relax for 30 seconds. Repeat on the other side.
Shoulder Exercises
While stretches improve flexibility, the following exercises are designed to strengthen your shoulders.
These exercises should be done three times a week. Several use resistance bands; select a band that offers comfortable resistance. The last exercise calls for light weights (up to five pounds).
This routine is meant to help prevent shoulder problems. As with any exercise program, speak to your practitioner if you have a pre-existing condition, especially if it involves the shoulder.
Wall Pushups
These are especially helpful if you can’t do regular pushups, as they keep pressure off your wrists. Start with five reps and move up in five-rep increments; keep the movement slow and controlled throughout.
1. Stand arm-distance from a wall with your feet hip-distance apart. Place both hands flat against the wall shoulder high and shoulder-width apart with your fingers pointing towards the ceiling.
2. Slowly bend your elbows until you almost touch the wall with your nose. Keep your body in alignment throughout with your elbows bent out to a 45° angle.
3. Slowly return to the start position.
Wall Angels
The key to this exercise is keeping your head, arms, upper back and buttocks in contact with the wall at all times. Repeat slowly for 5 to 10 repetitions.
1. Stand up straight, legs hip-distance apart, about six inches away from a wall. Then lean your head, shoulders, upper back and buttocks against the wall (you should maintain a small space in the lower spine).
2. Draw your navel in and your ribs in and down until you feel the middle of your back touch the wall. If you’re having a hard time keeping your head in alignment, place a small pillow behind it.
3. Reach your arms upward and place the backs of your hands on the wall in the V position.
4. Bend your elbows, slowly lowering your arms until your hands are just above shoulder height. Hold for a count of five before moving back into the V position.
Standing Row
This exercise uses a resistance band. Start with three sets of eight reps for each side; as the exercise becomes easier, move up to three sets of 12 reps.
1. Tie the band into a loop about three feet long. Attach the loop to a doorknob or other stable object.
2. Stand facing the attachment point, holding the band with your upper arm against your body and the elbow bent at a 90° angle.
3. Keep your arm close to your side and slowly pull your elbow straight back, then return to the start position.
4. After doing all the reps on one side, repeat on the other side.
Internal Rotation
This exercise uses a resistance band. Start with three sets of eight reps for each side; as the exercise becomes easier, move up to three sets of 12 reps.
1. Tie the band into a loop about three feet long. Attach the loop to a doorknob or other stable object.
2. Stand parallel to the attachment point and hold the band with the hand closest to it, keeping your upper arm against your body and the elbow bent at a 90° angle.
3. Keep your elbow close to your side as you bring your arm across your body, then return to the start position.
4. After doing all the reps on one side, repeat on the other side.
External Rotation
This exercise uses a resistance band. Start with three sets of eight reps for each side; as the exercise becomes easier, move up to three sets of 12 reps.
1. Tie the band into a loop about three feet long. Attach the loop to a doorknob or other stable object.
2. Stand parallel to the attachment point and hold the band with the hand farthest from it, keeping your upper arm against your body and the elbow bent at a 90° angle.
3. Keep your elbow close to your side as you rotate your arm outward, then return to the start position.
4. After doing all the reps on one side, repeat on the other side.
Pull Apart
This exercise uses a resistance band; use one you can control for two or three sets of 15 repetitions.
1. Hold the band with an underhand grip at shoulder height; your hands should be slightly wider than shoulder-width apart, arms long with a slight elbow bend. Your feet should be hip-width apart; stand tall with your chin tucked.
2. Rotate your shoulders outward to engage your muscles and engage your core. Then squeeze your upper back to begin pulling the band apart.
3. When your upper arms are in line with your back, squeeze your upper back muscles and pause.
4. While maintaining alignment, allow your arms to return to the starting position.
Horizontal Abduction
Begin with a weight that allows you to do three sets of eight repetitions and progress to 3 sets of 12 repetitions; as the exercise becomes easier, move up to three sets of 12 reps. You can also add weight in one-pound increments to a maximum of five pounds; each time you increase the weight, start again at three sets of eight. Control movement as you lower the weight.
1. Lie on your stomach on a bed with your arm hanging over the side.
2. Keep your arm straight and slowly raise it up to eye level, then slowly lower it.
3. Do all the reps on one side before repeating on the other.
IMPORTANT DISCLAIMER
The information in this blog is provided for educational purposes only and is not a substitute for consultation with a doctor or qualified healthcare professional. Consultation with a doctor or qualified healthcare practitioner is strongly advised, before starting any regimen of supplementation, a change in diet or any exercise routine. Individuals who engage in supplementation to promote health, address conditions or support any structure or function of the body assume all risks. Women who are pregnant, especially, should seek the advice of a medical doctor before taking any dietary supplement and before starting any change in diet or lifestyle. Descriptions of herbs, vitamins, nutrients or any ingredients are not recommendations to take our products or those of any other company. We are not doctors or primary-source science researchers. Instead, we defer to the findings of scientific experts who conduct studies, as well as those who compile and publish scientific literature on the potential health benefits of nutrients, herbs, spices, vitamins or minerals. We cannot guarantee that any individual will experience any of the health benefits associated with the nutrients described. Natural Organics will not be held liable for any injuries, damages, hindrances or negative effects resulting from any reliance on the information presented, nor will Natural Organics be held accountable for any inaccuracy, miscalculation or error in the scientific literature upon which the information provided is based.
Like this article? You’ll love our weekly newsletter
sign up here!
**These statements have not been evaluated by the Food and Drug Administration. This product is not intended to diagnose, treat, cure or prevent any disease.